The First Three Sessions
The First Session
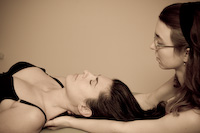
The first session's goal is to create a sense of "lift" throughout the body. The trunk can lengthen up and out of the pelvis, and legs can relax and have a sense of hanging from the pelvis. Some people appear to be jammed into the pelvis from both above and below. After the initial session, clients usually feel longer and experience freer movement in the pelvis.
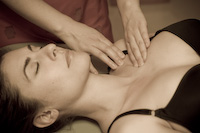
The breathing pattern is another theme of this session. Most of us employ only the upper rib cage, or only the belly, when we breathe instead of using the full rib area and the diaphragm. By skillfully working with the superficial tissues as they span the ribs and shoulder joint, your Rolfer helps you feel how to breathe using the diaphragm and the front, sides, and back of the rib cage to create a smooth full inhale. The lungs can glide more freely within their cavity. As breathing becomes easier, you may feel a shift in your nervous system.
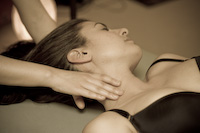
The first session involves some freeing of the tissue around the neck and shoulders, a lengthening of the structures on either side of the spine and those covering the lower back. Finally you will be invited to walk and describe what changes you feel. Reports of "lightness" and ease, and the sensation that one is taking up more space are common. To reinforce the session's results, you could imagine a string hanging from a helium balloon and tugging on the top of your head as you walk. Then try allowing your breaths to press against the sides of the ribs.
Want homework to practice between sessions? Check out the recommended reading on the Links page, and try these "Rolf Movement" Videos. These gentle exercises pair with each session in the series to help you integrate the work. You may do them prior to the session or after each session, and it's also fine to go through the Rolfing process without using them - it's just for those who want more!More movement to support shoulder health and breathing:
Scapula slides: an easy way to improve your shoulder stabilization. Do them at the wall or on the floor.
Shoulder circles: from Qigong (focus on the first 90 seconds of this video).
Hanging for shoulder health: Why hanging is important and how to do it.
Forearm self-care: In addition to these instructions, slowly twist your forearm as you apply pressure.
Breathing Meditation: watch a simple geometical shape unfold, use the settings to slow it down.
Breathing Meditation: watch a rainbow mandala expand and contract, slowly and lengthening over time, with a lovely soundtrack that includes bells.
The Second Session
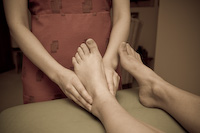
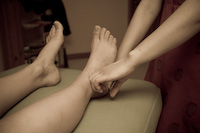
The second Rolfing session centers around the feet and the legs up to knee. Many people don't use their whole foot. Old ankle injuries may cause you to rely on the outer edge of the foot, or cause you to collapse inward. In addition, most people walk by stepping too far forward and forcing the legs to pull the upper body along after them. This habit puts too much pressure on the heels, reduces flexibility in the toes and metatarsals, and causes hamstring tension. If, on the other hand, the upper body initiates a step by "falling" lightly forward, the legs can easily swing forward in response, and the body's weight will be "caught" by the whole foot. Then the foot is able to roll through each joint, including the small bones in the toes. To teach this way of walking, the second session begins with the feet.
After one leg has been worked with,
clients are
asked to walk and compare the action of the two legs. Invariably, they
report that the leg which has been Rolfed feels stronger, more secure.
Often they notice that the weight travels differently through
the foot during walking. Sometimes
they notice a difference in sensory input as well: Ida Rolf said with a
smile that "the carpet feels more expensive" under the foot that has
been
worked on. The other
leg will then have its turn, along with some work on the back
and neck to
complete the session.
For an article that I wrote about foot health and shoes, as well as other information on these topics and free videos, please visit the Feet page.
Session 2 Movement Integration videoThe Third Session
The third Rolfing session is about integration. It ties the first two sessions together into a complex whole. It is the last of the introductory sessions and a crucial point for both Rolfer and client. If, for any reason, either one wishes to delay the series, it is advantageous to do so before the fourth Rolfing session, which begins to deal with the deep structures of the pelvis.
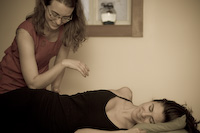
Fundamentally, the third Rolfing session deals with the "lateral line" from the greater trochanter of the femur, or thigh bone, to the head of the humerus, or upper arm. The client lies on one side as the Rolf practitioner arranges the shoulder, ribs and pelvis so they can stack up evenly. The rib cage must be free from the shoulder girdle on top and the pelvis underneath. The Rolfer's goal is to set each in its own space without crowding from its neighbors. The result will eventually be freer breathing and less painful crowding of the structures.
For homework after the third session, try imagining that your
pelvis
is hanging from the rib
cage like a swing hanging from a tree limb.
Session 3 Movement Integration
video
